Saturday, June 30, 2012

Darling Diva Polish: Swatches & Review

 Fair warning: this post is picture-heavy and full of an insane amount of glittery awesomeness. 


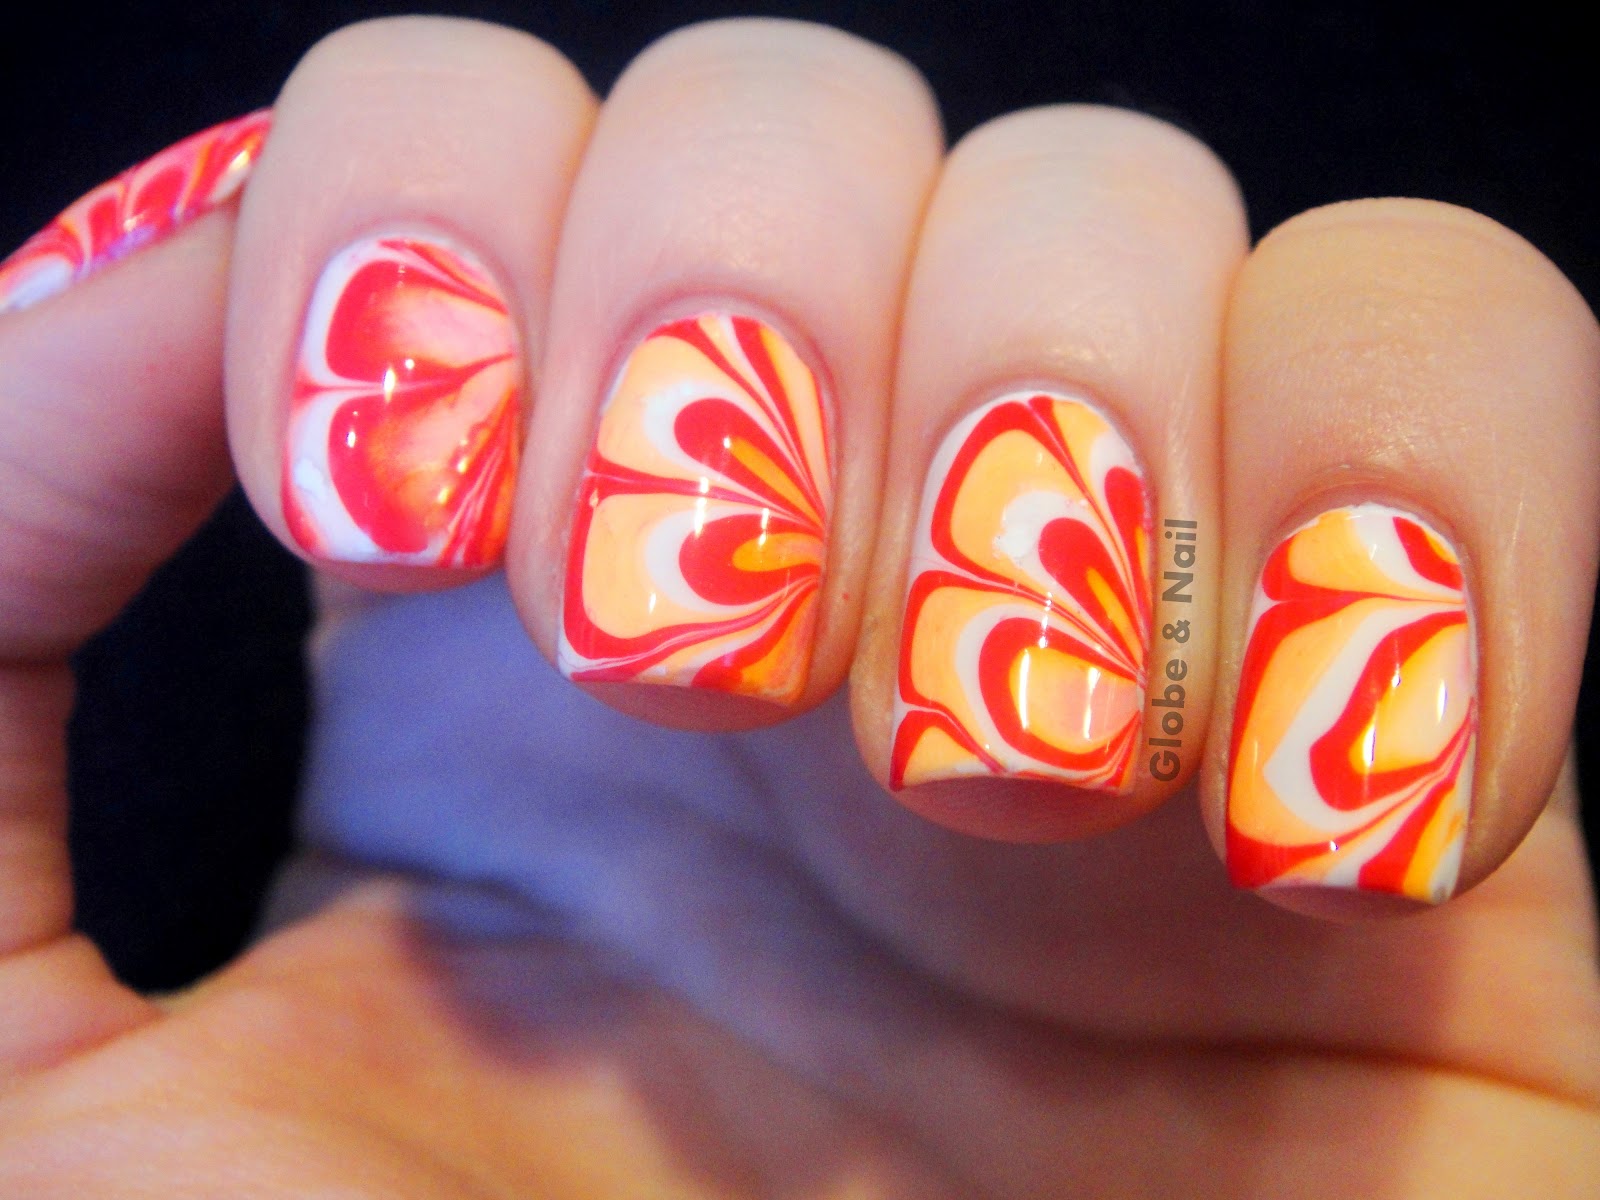
I've got three polishes from Darling Diva Polish to show you today; Dusky Sky, Tiny Bubbles, and Vegas Showgirl. 


Fist off I've got Dusky Sky, a gorgeous sky-blue holographic polish.  Holos aren't normally my cup of tea, but holy cow, this is gorgeous!  It applied like a dream, three thin coats and no top coat.  The formula on this was so perfect and easy to work with that I didn't need to do any clean-up at all!  I honestly wasn't expecting to love this one as much as I do!

Sunlight
Artificial light
Artificial light

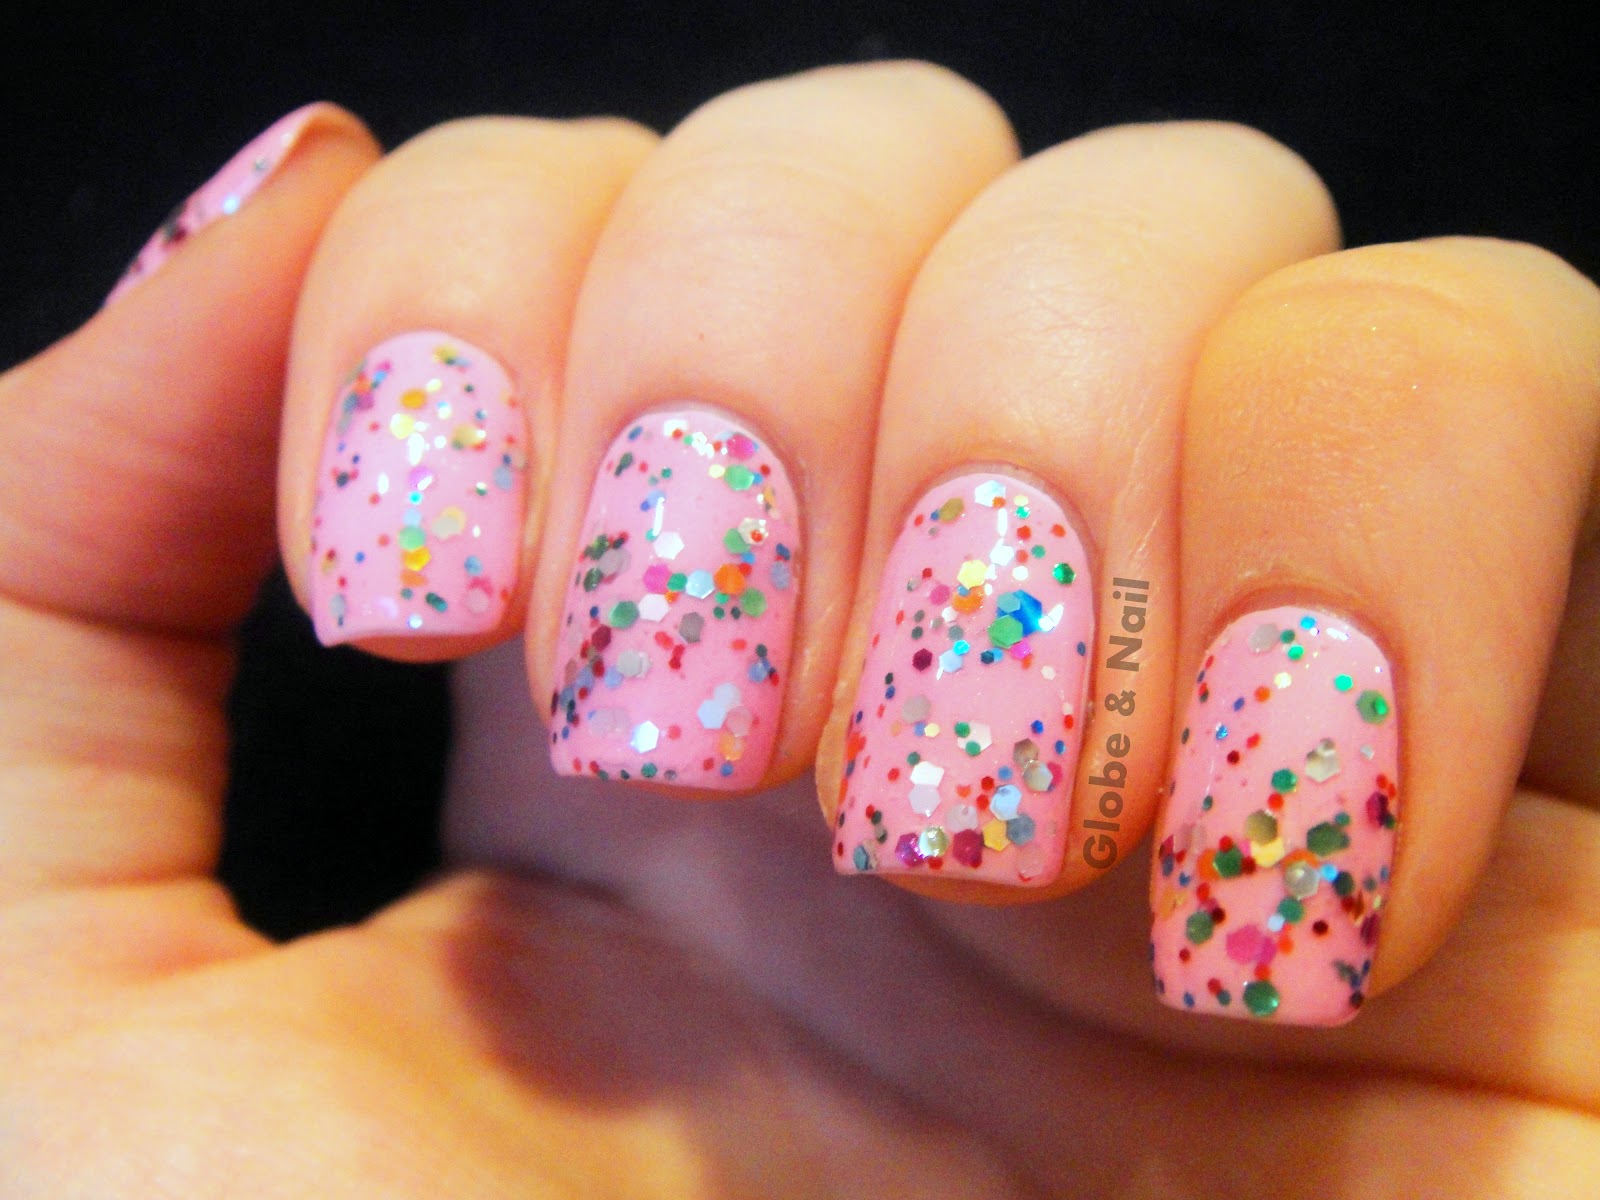
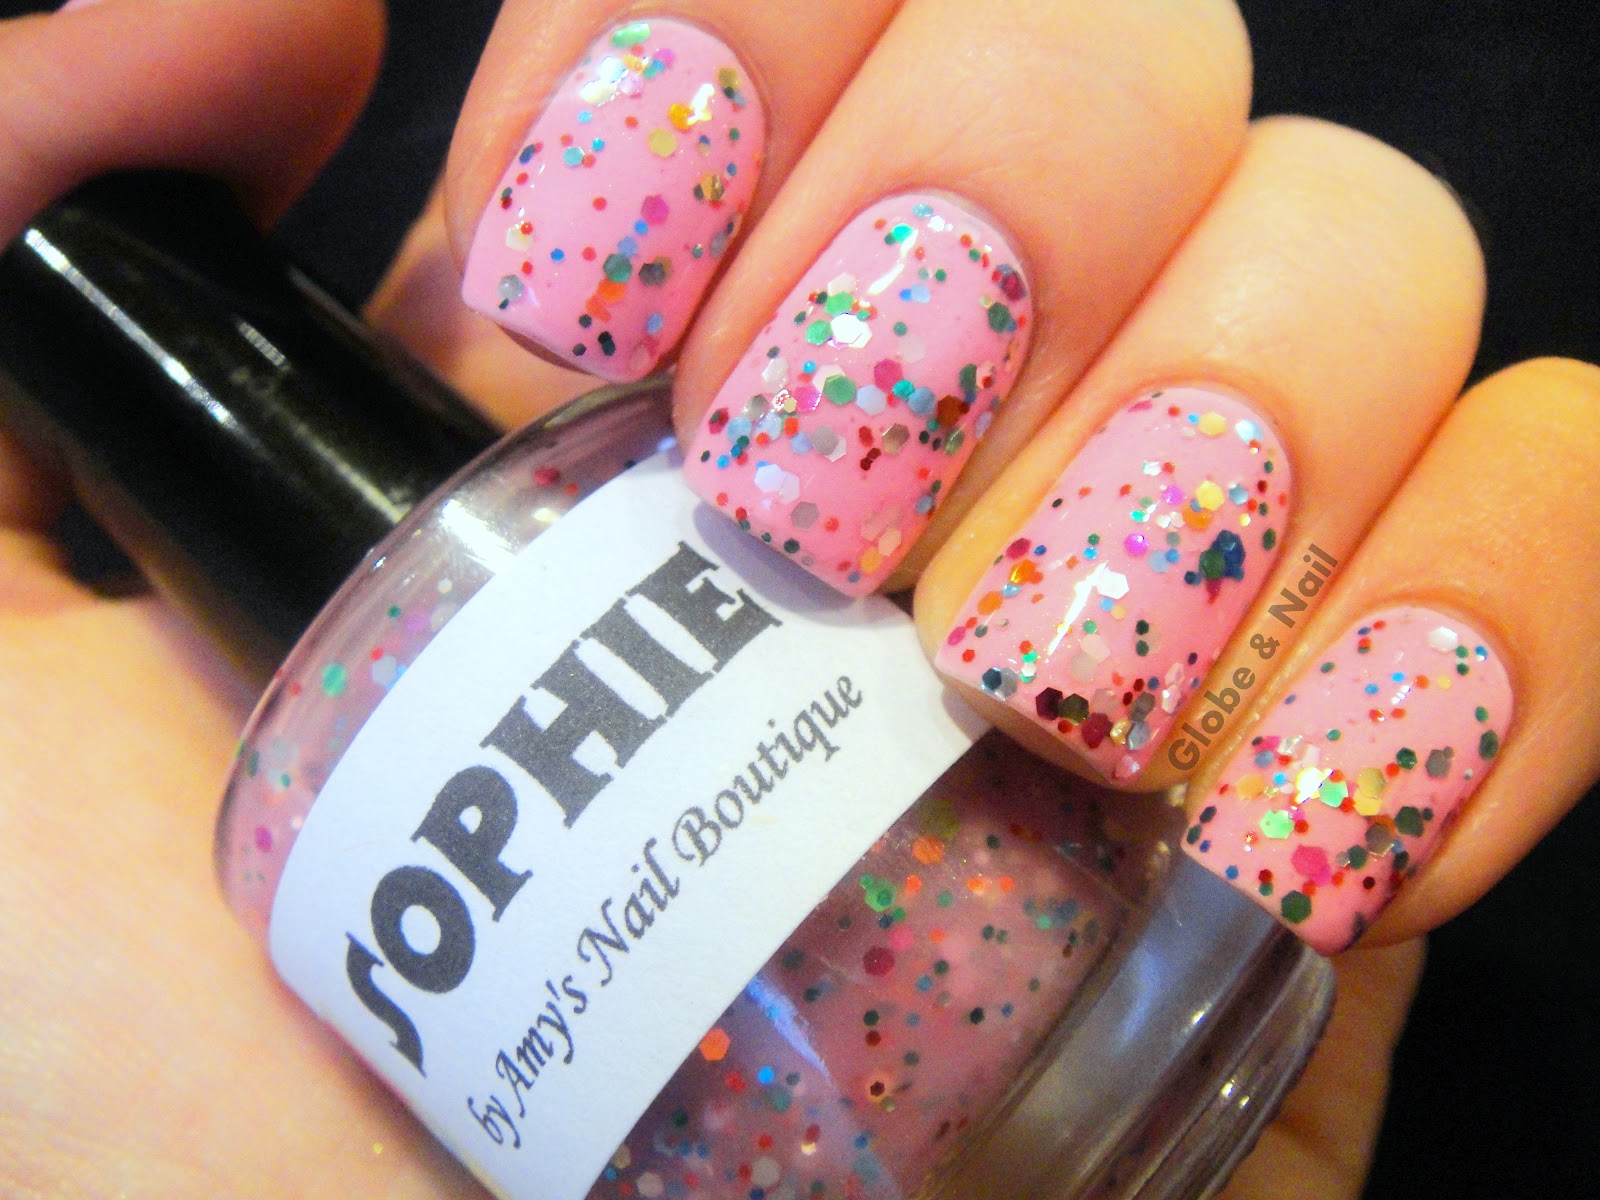
Next up, we've got Tiny Bubbles; a mix of small hex, medium hex and square, and large hex white matte glitters and medium light blue hex glitters in a teal-blue jelly base with micro holo glitter.  Phew, that's a mouthful.  (Who's with me on the "Hooray for matte white glitter!" bandwagon?) This one did require a little bit of fishing and placing glitter, but I think that's to be expected when you're dealing with glitters like this.  I did manage to get out two of the large hexes without trying too hard. 

Here I've layered two coats of Tiny Bubbles over a few different polishes.  Index to pinky: Sally Hansen Xtreme Wear White On (1 coat), OPI Yodel Me On My Cell (2 coats), OPI No Room For The Blues (1 coat), and Darling Diva Polish Dusky Sky (3 coats).  I didn't use a top coat for the pictures, though I think you'd need two layers of a thick top coat to smooth it out. All of the glitter just blends in over the white on my index finger, unfortunately.  Out of the other three, I can't decide which one I like the best!  Which is your favourite layering combo? 


Last for today we have Vegas Showgirl.  This amazing glitterbomb is a mix of medium green hexes and purple squares, small green squares and purple hexes, and purple and green micro-glitter in a clear base.  The formula on this one was very easy to work with, and I didn't have any trouble with placing the glitters.  A few of the squares curled, but two thick coats of Seche Vite smoothed it all out.  


On my index and middle fingers, I did one coat of Vegas Showgirl each over Sally Hansen Xtreme Wear Lacey Lilac  (2 coats) and Orly Jealous, Much? (3 coats).  As you can see, you get pretty good glitter coverage with just one easy coat.  


On my ring and pinky fingers, I did two coats of Vegas Showgirl each over Zoya Savita (2 coats) and Sally Hansen Xtreme Wear Black Out (1 coat).  Pictures show no top coat. 


Take a look; how awesome is this?  Which one's your favourite? 


Darling Diva polish is available to buy on their Etsy store, and you can like their Facebook page for updates and lots of polish pictures.  She is restocking and opening her store again this Sunday (7/1) so be sure to check it out and snatch yourself up a few of these beauties! :)

Also, don't forget to enter my 100 Follower Giveaway, open to Canada and the US! 

Any guesses as to which polish/layering combo I put on for my whole mani?  You'll see tomorrow ;)


Disclaimer: The products in this post were sent to me for review and my honest opinion. 

Friday, June 29, 2012

Oranges

Before we get on to today's nails, I'd like to remind everyone about my 100 Follower Giveaway!! Open to Canada and the continental US; just leave a comment with your email address! :)

I've used Essie Action a few times in nail art, but I had yet to use it by itself. I went with my trusted method of adding some studs because I didn't want to cover the colour with any other colours or nail art.  Here I layered two coats of Action over one coat of Sally Hansen Xtreme Wear White On.  One coat of Seche Vite, some studs, one more coat of Seche Vite. 

Unfortunately the polish went all bubbly on me and it shrunk a bit with the Seche Vite, which normally doesn't happen with Essie.  Also, let me say that my camera was freaking out and the colour in the pictures is nowhere near the colour it is in person.  The most colour-accurate picture I can find is in The PolishAholic's review of the Poppy-Razzi collection, but it is still much more neon.  In real life this is a true highlighter-orange. 


I wasn't going for literal oranges when I was placing the studs, but I'm definitely getting that look from them and I think it's really cute. What do you think? :)

Wednesday, June 27, 2012

Summer Water Marble

Decent-looking water marbles have continually evaded me for quite some time now.  Before I started blogging, I had attempted multiple times but the colours always looked muddy or bled together or had billions of bubbles.  Last night, all that changed. 

Since this is the last week of dance for the school year, we're doing some fun stuff this week.  Today all the intermediates and seniors and a couple teachers are going to a friend's house for a pool party (and water aerobics, apparently) so I wanted something fun and summery on my nails.  I have no idea what possessed me to try a water marble again after the failures I've had with it in the past, but I'm so glad I did!  For some of you who consistently do amazing water marbles this may seem like a fail, but for me this is a huge WATER MARBLE WIN.  (Anyone else read that like Tobuscus?)

Moving on; I started with a base of Sally Hansen Xtreme Wear White On, and did the marbling with Essie Action, Essie Watermelon, and OPI Don't Touch My Tutu.  My camera was freaking out because the colours were so bright, so imagine the orange as less-yellow-more-orange, and the pink is more pink-y.  Yea. You get it. Two coats Seche Vite.  Pictures!


I swear I re-did my index finger 4 times, but the colours kept bleeding and it refused to turn out like the others.  Oh well.  What do you guys think of my water marble?

Also, don't forget to enter my 100 Follower Giveaway! Now open to Canada and the US! :)

Tuesday, June 26, 2012

More Stripes & Dots

Firstly, let me say that if I had to choose, Essie would be my favourite nail polish brand.  I don't own an outrageous amount (considering my stash is only around 120  bottles), but my Essies far outnumber the other brands.  With that said, I've got a mani to show you using two Essie polishes: my recently acquired Mojito Madness, and Mesmerise

You probably won't believe me, but this is one coat of Mojito Madness.  Yes, ONE COAT!  Without giving it a thought I had expected to have to do 2 coats, but after just one (and not a particularly thick one) I couldn't even come up with a valid reason to add a second coat!  This polish is such a beautiful colour; add  the flawless formula and this one's a huge WIN in my books. 

Anywho, I'm (not really) sorry to say that I loved my stripes and dots so much last time that I couldn't help but do it again.  I did, however, do thinner stripes and smaller dots.  Apologies in advance for the lighting, the sun would come out for two minutes and I'd adjust my camera accordingly, and right before I could take the picture it would go away, so I'd set my camera and then the sun would come back out... you get the idea.  

Is anyone else getting a polo shirt vibe from this? 


I must say that I do like this one better than my previous stripes & dots mani; what do you think? 

Also, don't forget to enter my 100 Follower Giveaway! :)

Monday, June 25, 2012

100 Follower Giveaway! CLOSED

Yesterday I hit 100 followers and this morning I passed 3000 pageviews, so it's time for a little giveaway! :)

One winner will receive one new bottle of Revlon Whimsical and one new bottle of Revlon Sparkling.  Rules below.  It is open from now until Sunday, July 8th, to followers in Canada and the continental United States!


To enter, just comment below with your email so I can contact the winner.  You must be a follower of my blog (I'll check!).  The giveaway will be open from now until Sunday, July 8th.  At that point I will assign each entry a number based on the order in which you commented, and will use a random number generator to pick the winner.  I will email the winner and they will then have 48 hours to get back to me before I pick another winner.

There will be two entries available per person; you will be given one (1) entry just for commenting and providing your email, and you can gain an additional (1) entry by sharing this giveaway on your Facebook, Twitter, blog, or Instagram.  If you share this giveaway, be sure to include a link  in your comment with your email so that I can verify it.  If you share via Instagram, tag me with @emmaclarem on the photo.

Sorry to all my international followers, but since this is my first giveaway it is only open to Canada and the continental United States.  I hope I can have international giveaways in the future.

I think that's everything, but if you have a question or something isn't clear, send me an email at ecm.dancer@gmail.com.  Good luck! :)

This giveaway is not sponsored and the products were purchased by me specifically for this giveaway. 

Sunday, June 24, 2012

Amy's Nail Boutique: Sophie

Hello! Sorry for the late post today; I was eating waffles and painting my nails this morning, doing chores all afternoon, and went to a youth group BBQ party this evening.  Unfortunately I lost a small chunk out of my nail during an intense game of Ultimate Frisbee; I blame Jeremy.  Luckily it's conveniently located where I can hide it in photos. 

On to the polish!  Today I have a lovely polish to show you from Amy's Nail Boutique called Sophie.  It is a mix of multicoloured glitter in a milky pink base.  It seems to resemble both Deborah Lippmann and Claire's Candy Shop, though I don't own either for comparison.  

The glitter was fairly sparse and the base was very sheer, so here I have layered 3 thin coats of Sophie over one coat of OPI Mod About You.  Using that polish as underwear made Sophie appear very bright, and I think it would take on a completely different look were you to layer over a more muted pink.  Application was a breeze, and glitters spread evenly.  I was very pleased that only one coat of Seche Vite was required.  


You can buy Sophie and lots of other beautiful polishes from Amy's Nail Boutique on Etsy where they sell for $8USD per full-sized bottle, and like her Facebook page for shop updates and more swatches! 

And some quick news: now that I'm pretty much through my "busy season" (apparently I thought that would be the best time to start a blog) I'll be doing lots more nail art and things different from the swatch posts I've been doing lately!  Yay!  Also...  I HIT 100 FOLLOWERS!! You guys are awesome; I appreciate every single one of you and love hearing from you!  As promised, as small giveaway will be happening; I'll post information tomorrow morning! :)


Disclaimer: The product in this post was sent to me for review and my honest opinion. 

Friday, June 22, 2012

Stripes & Dots

Hooray!  I'm done my provincial exam!  I think it went pretty well.  Now I only have a couple of outstanding bits of assignments left to do, and then I'm done Socials forever! (It's my least favourite subject, if you can't tell.) 

Anywho, here's the nails!  On my (first ever) trip to Ulta (heaven!) last weekend, I picked up 2 new polishes for myself, Essie Mojito Madness and Zoya Dove.  So on Wednesday morning I painted my nails with Dove, an absolutely beautiful grey!  Is it normal to call grey beautiful?  I'm a real sucker for grey polishes.  I want them all!  Anyways, I knew the plain mani could only last so long, so after about three hours of studying  that night (and feeling very brainwashed) I took a quick break to add stripes in Sally Hansen Xtreme Wear Black Out.  Stripes are my absolute favourite thing to have on my nails, but I don't do them near enough.  Since I don't have any striping tape and have to literally cut up strips of tape, I got lazy and just did polka-dots on my right hand.  I actually quite like the two hands similar-but-different!  Picture of both hands at the end of the post.  


I know I said I'd never take a picture like that again because it looked like a spider, but I couldn't figure out  another pose for both hands that wasn't super awkward. 

Also, I have some good news and some terrible news.  Terrible news first: the ballet school that I'm going to for a month in the summer doesn't allow us to wear nail polish in class.  I think I died a little when I found out.  Of course I'll still paint them super-sheer neutral colours, but probably nothing worth posting.  I'm figuring out some different posts for those four weeks.  If you would like to do a guest post for me to be posted between July 22 and August 18, please let me know ASAP, I'll be extremely grateful!  You can e-mail me at ecm.dancer@gmail.com if you're interested.  

Good news: I'll be having a small giveaway once I reach 100 followers, so keep an eye out! :)

Thursday, June 21, 2012

Tina and Lucy: Watermelon

This morning I've got my last Tina and Lucy polish to show you: Watermelon.  Watermelon is a mix of white matte micro-glitter and medium black hex glitter in what appears to be a pinky-red jelly base, but when it gets on the nail it's much brighter and bordering on neon coral in some lights. 

It is very sheer, so here I've layered three coats of Watermelon over one coat of OPI Mod About You, followed by one coat of Seche Vite.  The jelly base of Watermelon is very pigmented, and completely changed the colour of the OPI.  The formula on this polish was pretty good when applying, though in the bottle all of the glitter settles in a layer on the bottom after sitting for 5 minutes.  Before using it I turned it upside-down for a few minute, and then gave it a good shake and it was pretty evenly mixed.  The black glitter is very sparse, and you can see from the pictures how much I got from three coats. Some of the glitter did like to clump together, but it wasn't too noticeable.  

The colour was spot-on with the name, and after three coats, my nails looked so squishy and delicious, just like real watermelons! Picture time:


The following picture is what this polish looks like in most indoor lighting:


Sorry for the blurry picture, it was the only one I had with the bottle.

I think this is a really fun polish for summer; it really looked like watermelons and there were a few moments where I kind of wanted to eat them.  That is, before I remembered it was nail polish.  Have I been inhaling too many polish fumes?  Probably.  

Anyhow, you can buy Tina and Lucy polish from their Etsy shop, and like their Facebook page for updates. The shop is temporarily closed, but will be open again soon!  What was your favourite of the Tina and Lucy polishes I've shown? Is it PeatMoonstone, or Watermelon? Let me know in the comments! :)

My provincial exam is today, so I'm not really sure why I spent my morning writing a blog post instead of studying... I must really love you all!  I'll hopefully show you the polish I'm wearing for my exam today later tonight.  Wish me luck! 

LinkWithin

Related Posts Plugin for WordPress, Blogger...